Pages

Wednesday, October 9, 2013

Distressing Techniques without Distress Inks - Technique 1: Sand Paper

Heya peeps!

What fun distressing paper looks like! So I decided to do some research of my own. I went through loads of blogs and tutorials showing how to distress paper using distress inks and yadi yadi. I kept on looking till I found A cherry on top. This blog here showed some interesting distressing techniques, both with and without distress inks. As a budget crafter, it struck my fancy. So I decided to try out the budget techniques for distressing paper and archiving them all together with my experiences.

For this first technique, you will require:


  • Sand paper (medium coarse)
  • Cardstock
I applied this two different ways. First, I took a piece of cardstock and distressed the edges. this is done by sanding right at the edges of the paper.


The right side is not distressed. The left side shows the distressed edges. works *wink*

The second, I sanded the entire face of the project I was working on.

Before Sanding
After Sanding

After sanding, the paper felt coarse and the texture became more pronounced. Works too *smiles*

Here is the completed project (I just had to!)


Wednesday, October 2, 2013

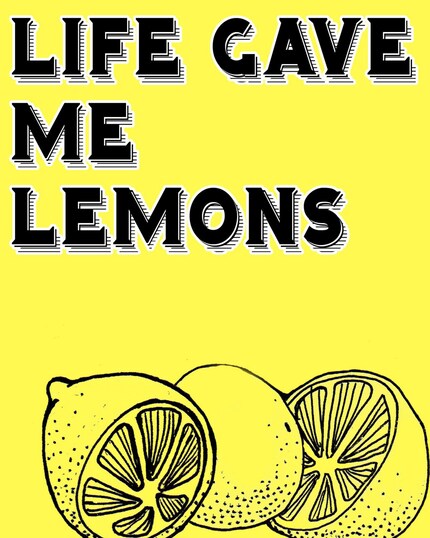
When Life Gives You Lemons...Life Lesson

Heya peeps!


Haven't been around for a while. But that's because life gave me LEMONS...very sour ones. It's a lot to take in when people lie to you and be good to your face but in reality, they don't even like to see your face?! Here come in the manipulators. And here you are trying to be miss goody two-shoes, wanting world peace *spits*

It only works out in fairy tales doesn't it? Only in fairy tales there is a happily ever after. Reality check: happily ever after comes only if you numb yourself and detach yourself emotionally. Ok, enough negativity for today. Let me go find some sugar for these lemons now.


Wednesday, August 21, 2013

DIY: Glitter Stamps

Heya peeps!

Don't buy expensive stamps when you can make your own in just under Rs 100 or $1! Budget crafters here we go! Learn how to make these dazzling stamps to create works of art!


Here is what you will need:


  • Mod Podge or White Glue
  • Some block printing blocks in design of choice
  • Glitter in color of choice
Cover your work surface with newspaper. Keep another scrap piece of paper handy.

Apply a thin layer of Mod Podge to your block.


Then press it on your newspaper in order to take off excess glue.


Next, press it on your paper project I am printing on my Origami Leaf Card Envelope. Learn how to make it here. Lift off lightly so as not to spread the glue.


Next, apply a layer of glitter on top of the printed glue.


Tilt your card on the scrap paper to dust off excess glitter. This may be re-used for more projects!


This is what you will get:


Pretty, isn't it? Embellish with lace, ribbon or jewels and your'e done!


Monday, August 19, 2013

Aaaaahh.....The Endless Joys of Having Your Own Workspace

Office? Cabin? Studio? No! A simple writing desk would do for all my crazy adventures! (Although a studio would be a good investment)


I got my desk moved over! It arrived in late evening and who was to wait for the next day? Why not today? So I set it up. I moved all my stuff to my desk and now I can craft happy.

#overjoyed# #monkey dance#


Friday, August 16, 2013

A Proper Space...

Here's some exciting news I thought to share with you peeps...I am shifting my old table to my new home!
This means I get a proper crafting space...no more searching for substitutes...no more laziness regarding work. With proper space, I can craft and craft away all day!!

PS Searching for proper channel to sell craftwork :)

Thursday, August 8, 2013

Eid Mubarak!

Eid Mubarak to all you peeps out there! Hope this Eid brings proseperity to all. May Allah Subhanawata'allah accept our prayers and ibadah of Ramadan. . And may we be able to exploit the benefits of next Ramadan. Insha allah and Amen.

:)

Thursday, July 25, 2013

Tutorial: Easy Origami Leaf Pocket Envelope

Make a quick pocket envelope with this easy tutorial!


Cute isn't it? It just takes a few steps. Learn the basics and let your imagination run free.

Here's what you will need:
  • A4 paper (printer paper, 70-80 gms)
  • Imagination ;)
Take a sheet of A4 paper, color of choice, and fold diagonally.


Open the fold. Then fold from other side.


When you open the paper, you will find an X formed from the creases.


Next, take the left corner and bring it towards the center of the X.


Open the fold. Now you have a line which will form the base of the leaf folds.


Fold the corner such that it meets the base line.


Open the fold. You have made two guide lines:


Next, make accordion folds. You could go on instinct but a much neater method will be to continue halving the portions. Now, with the initial two guide lines, fold so that the two lines meet.


open the fold. You have three lines. fold again to make a small division like so:

Halve it still, for a very small division.


This may clarify:

This is the fold-size you want:


Continue folding till you have folded the entire corner section. This is what it will look like:


Almost done with the leaf! Pinch the middle of the folds to make a diagonal fold. Since we did this in our first two steps, the fold will be easy and accurate.


Here is what it will look like after folding:


Fold the paper in half like so:


Next, fold the accordion side inwards.


Here's what it will look like:


Open the half fold.


Now fold the two corners, such that they meet on the center crease.


Fold in half again.


To form the envelope, we have to fold it so it forms a neat little pocket. Here  is the trick: See the little line? This is where we will fold the long corner outwards.


This is what it will look like:


Here is the back:

See this little triangle?

Fold it inwards and tuck!

Here is your pocket envelope!


Let your imagination run wild with these little guys ;)


Monday, July 22, 2013

The Crafter's Expo 2013

Heya guys!

I'm really excited today! Firefly girl, Varah Musavvir is hosting the second Crafter''s Expo in Karachi in December. My stall booking got confirmed and I am positively ecstatic and can't wait for a wonderful experience (Insha Allah)! This will be the first expo for Nidzy's.

Check out the details at the following link:

http://whimsicalfirefly.wix.com/craftersexpo
http://www.facebook.com/GuildofCraft


But wait a minute....this means more crafting! Woohoo! So now, everyday is crafting day!

*happy dance*

For the upcoming expo, I have lot's and lot's of crafting to do (duh)! Let's see if we can pull off some time for the tutorials...


Thursday, July 18, 2013

Crafting....A Safe Haven?


So true when it comes to artists and crafters. However, I would add that "he who works with his hands and his head and his heart is a crafter." Agree or not? I would say affirmative! Many would not understand this. But us crafters relate to this addendum ;)

I have come across in situations where people ask me: "what are you going to do with this garbage?" I say to them: "well, create great works of art, of course!" And they say "say wha-at?" Mhmm ( Queen Latifah style). Crafting does not mean buying expensive material and making amazing products. a True crafter would grab them scraps and reuse and recycle in ways unfathomable to an (ahem) ordinary person (no offenses). This is real crafting. 
Ruffle flowers from fabric scraps

For me, crafting is my world (second to my husband). It is my safe haven. A place I go to for respite in times of hardships. Crafting boosts my motivation, my self-confidence. Crafting is what defines me. Crafting is not merely transmuting vision to product. It is a journey. A journey towards self-fulfillment. A journey that may or may not be lucrative but it is a journey still that is productive and constructive.

Thus, crafting is a safe haven. It is something that brings peace and tranquility in chaos; where hardships seem like little specks; where problems fade away. Although it requires the mind, it also requires the body and soul. The soul needs, the mind responds and the body acts. It is so beautiful that even the loneliest of moments are not lonely. The whole world becomes a canvas to the imagination (Thoreau).